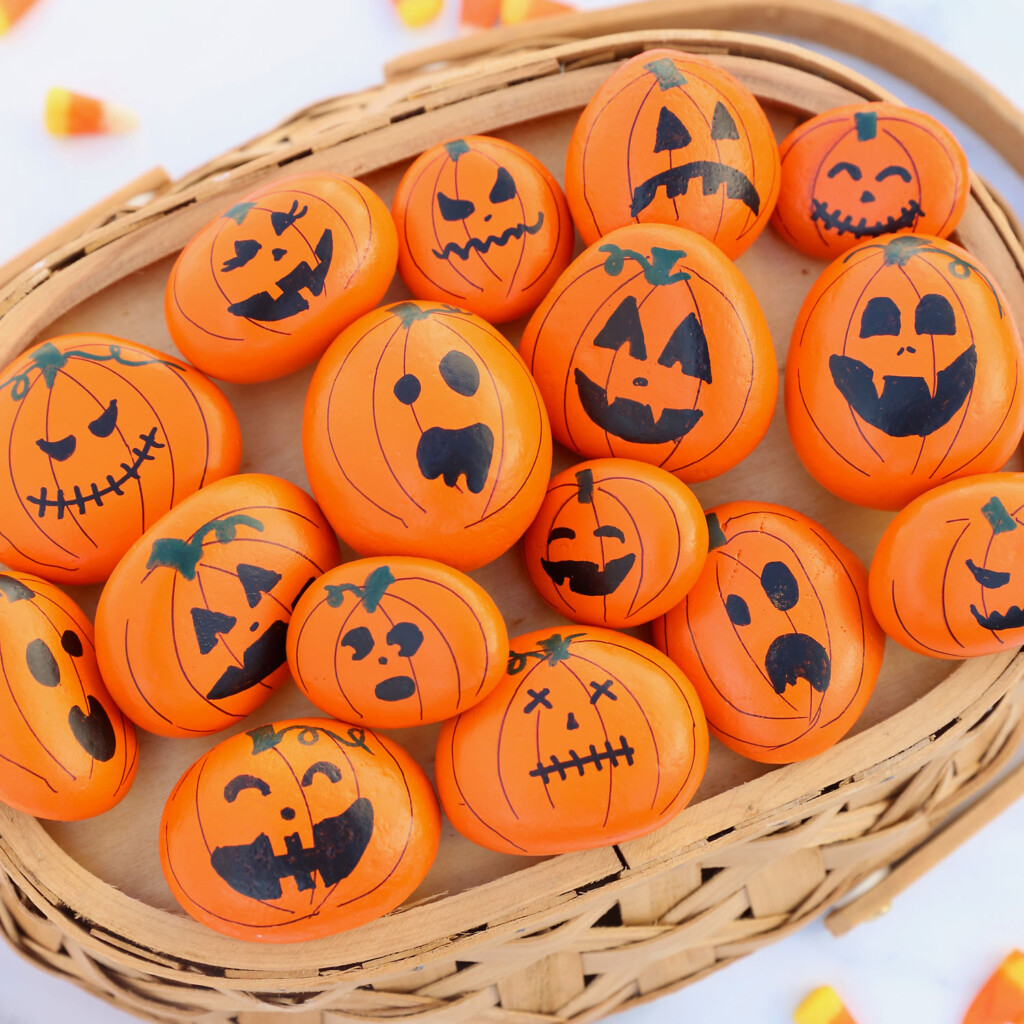
Pumpkin Painted Rocks
In today's post: Larn how to turn river rocks into ambrosial pumpkins with this easy Halloween craft for kids that's fun for adults too! Tuck these pumpkin painted rocks into your garden or place them around the neighborhood to make people smiling.

Today'due south project is a fun Halloween craft for kids and adults: pumpkin painted rocks. They're easy to make and plow out adorable. Kids will love sharing them with friends and neighbors. Get the step by step directions below.
For a super easy Halloween arts and crafts for kids, visit this post: Newspaper Pumpkins

How to Paint Pumpkin Rocks
You'll start by painting your rocks orange. You can employ cheap acrylic paint and a foam paintbrush. Depending on what colour your rocks are to begin with, you may need two coats of paint. If you are making lots of rocks and want to speed up the process, you tin use orangish spray paint instead. I only painted the top side of my rocks.

Once the orange paint is dry, you tin have fun decorating your pumpkin rocks and turning them into Jack-O-Lanterns.
- I started past drawing curved lines with an ultrafine Sharpie to mimic the texture of a pumpkin. I traced circles that I cut from card stock to make the lines – you could also trace the sides of pocket-size plastic lids.
- Then I drew a light-green stem on each pumpkin rock using a green paint pen, and added some curled vines to some of the rocks.
- Finally I drew faces on using a black paint pen. I googled "Jack-O-Lantern faces" and used images I establish online for ideas. Doing this made my pumpkin painted rocks MUCH cuter than if I'd only been trying to think upwards faces on my own.
Supplies
In lodge to make pumpkin painted rocks, you'll need the following:
- Rocks for painting
- Paint/paintbrush: y'all can use inexpensive acrylic craft paint and a inexpensive paintbrush, like a foam castor, but if you'll be making lots of pumpkin rocks I'd recommend using spray paint
- Black and Green Pigment pens: I used these ones from Walmart – y'all could too use paint and a small paintbrush only the pens are really easy to command
- Ultrafine black Sharpie if you'd like to add together lines to your pumpkin
- Clear Sealant, such as Krylon Matte Cease. Please annotation that some sealant sprays can cause Sharpie to plumage and run a little, so test your spray on one stone showtime. Also, spray from a little further away and use a couple very light coats to minimize this possibility.
- OPTIONAL: I cut some cardstock in circles of various sizes from about ane.5 inches to 3.5 inches and used these every bit templates to make smoothen lines on my pumpkins. This is totally optional and if y'all're making these with kids they might adopt to skip this step.

Where to Become Rocks for Painting
For painting, yous want smooth, round-ish rocks that are fairly apartment. I found a bag of white river rocks at my local Lowe'southward for well-nigh $xi (photo below). The bag has 50+ rocks of different sizes and shapes, and I was easily able to discover 20 rocks that worked bully for turning into pumpkins. I have plenty of rocks in other shapes left over for other paintings, and lots of smaller rocks as well.
If you'd like to social club rocks, you tin endeavour these options from Amazon:
- This set of xv black river rocks varies in size from 1 inch to 4 inches. The ones I received were dainty quality and very polish.
- This slightly more expensive set of 10 blackness river rocks are all adequately large, between 2.5 and four inches, and were very polish and dainty and flat.

South
Plough round river rocks into adorable pumpkin painted rocks with this piece of cake Halloween craft for kids and adults.
- Polish River Rocks roundish if possible
- Orange Paint acrylic craft paint or spray paint
- Cream Paintbrush if using acrylic paint
- Green and Black Paint pens
- UltraFine Black Sharpie
- Clear Sealer like Krylon Matte Finish, run into note below
-
Rinse the river rocks to remove any dust and permit to dry completely.
-
Paint rocks orange and allow to dry. You lot tin pigment both sides or just the side y'all plan to decorate. You tin use acrylic arts and crafts paint and a foam paintbrush, although if yous are making lots of rocks spray paint with be faster. Ii coats may be needed.

-
If desired, use the ultrafine Sharpie to add curved lines downwardly the forepart of the pumpkin. See note for tip near using circle templates here.

-
To decorate the pumpkin rocks, first by using the green pigment pen to draw a stem near the top of the stone. Add curled vines if desired.

-
Apply the black pigment pen to draw a Jack-o-lantern face on the pumpkin. Search online for jack-o-lantern clip art to get ideas.

-
When all the paint is fully dry, seal the pumpkin rocks with a clear spray.
To make it piece of cake to draw curved lines on your rocks, you tin can cut some circles out of carte du jour stock in a variety of sizes from about ane.5 inches to 3.v inches (use a circle cutter or trace various small round object like lids). Then trace around the border of a circumvolve to get nicer lines than you'll exist able to draw freehand.
Please note that some sealant sprays tin can cause Sharpie to feather or drain a little, so if you lot used a Sharpie to create lines y'all will want to test your spray on one stone starting time. I used Krylon Matte Finish spray and it did not cause the Sharpie to run. When sealing, use a couple very light coats instead of i heavy coat to assistance ensure the Sharpie lines stay crisp. If you have problem with the Sharpie running, you can try using Krylon Kamar varnish (which is supposed to exist condom for Sharpie art) or seal your rocks with Mod Podge instead.

Reader Interactions
Source: https://www.itsalwaysautumn.com/pumpkin-painted-rocks.html
Post a Comment for "Pumpkin Painted Rocks"